How to Make and Use a Jig with Your Laser

A jig is a cut sheet with pre-determined cut spaces to place additional material or blanks when working with your laser cutting machine. A jig is useful when engraving/cutting one or multiple items that are not your standard sheet material. Some of our favorite uses for a jig are when working with items such as watch bands, bottle openers, patches, phone cases, and coasters.
The main benefits of using a jig and a jig template for designing on blanks are:
1. Alignment: Incorporate your desired design into your jig template to ensure proper alignment on the blank once placed in your laser
2. Stability: Placing your blank or material within a jig helps hold it in place and limit the potential of accidental shifting during the laser process
3. Bulk Engraving: Copy the desired design(s) needed on the same type of blank into your jig document to cut and engrave multiple pieces at once
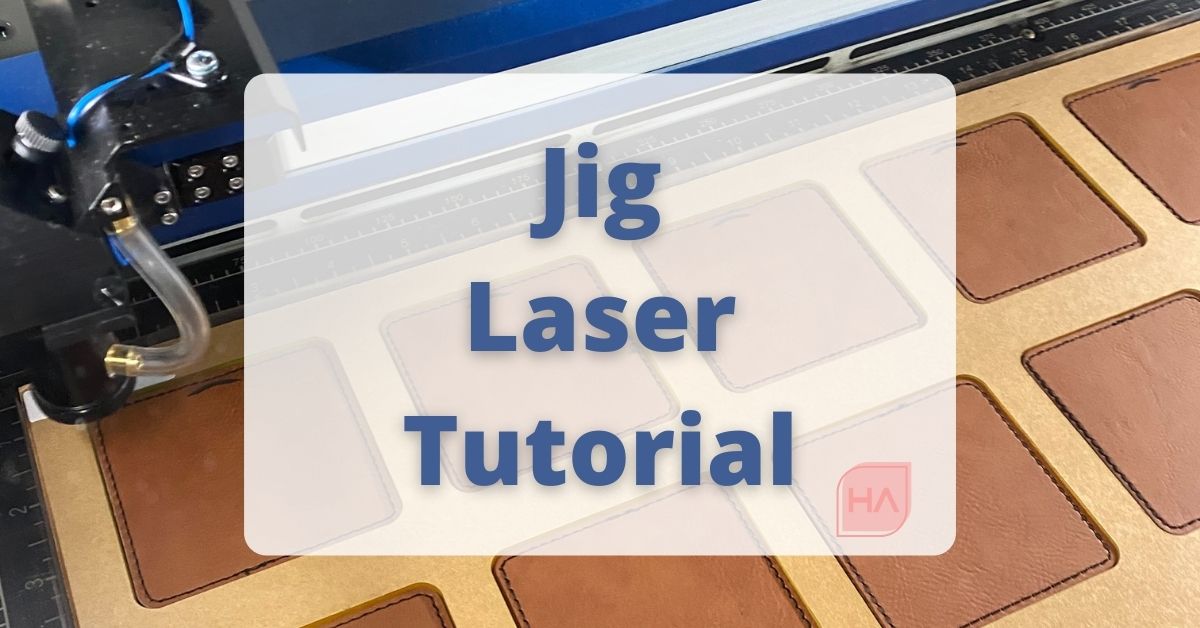
We recently made a jig for engraving our custom leather patches (find the patches here). With the jig we can engrave up to 15 leather patches at time with perfect alignment every time! Using the jig saves us time, headaches, and wasted material.
These are the steps we took to make our leather patch jig:
1. Open a new document in your design program, we used Adobe Illustrator, with the dimensions of your desired base material – in this case we used the dimensions of 12x19 inches.
2. Create a shape outline in the dimensions of the blank you are trying to secure. If you are creating a jig for our patches you can download an svg with the correct dimensions to make your jig.
Pro Tip: If you purchased your blank from a supplier contact them to see if they have the dimensions or even a vector file of the blank to copy into your document. If you are creating a jig for a base material you designed, such as a key chain base, make sure you have that design file.
3. Copy the shape outline as many times as possible to fit across your document. In this case, we could fit 15 squares for the patches. Even if you only plan to complete one item at a time, a jig is still very useful for maintaining the alignment of your design during the lasering process.
Pro-tip: Add the name, dimension, and laser settings for the material/blank the jig is for to your jig template and engrave it into your jig. You could also add the laserbed placement and laser cutting machine used (if you have multiple machines) of your jig to be engraved for future reference.

Now it’s time to cut your jig!
1. Determine your jig material: We cut our jig on 1/8 acrylic for durability reasons. We knew we would be using this Jig in the future and wanted it to withstand the test of time in our warehouse. To save money you could use cardboard, plywood or cardstock!
2. Pick the placement of your jig: You will always want to place your jig in the same spot when using it, otherwise you would need a new file/jig to ensure proper alignment. Another benefit of using acrylic as our jig material was to ensure our jig had a nice corner and straight edge to make it easier to put flush into the upper right-hand corner of laser bed every time.
Pro-tip: If you use a more flexible material, such as plywood, keep in mind that warping and bending may reduce the effectiveness of the jig overtime.
3. Cut out your jig: Send your jig template design to the laser! Since we were making the Jig and did not need anything engraved, we only cut the squares, no additional design elements. When the laser was done, we had a 12x19 piece of acrylic with 15 squares.
Using your jig template for your designs:

1. Import your design(s) to the jig template: Copy your designs over to your jig template. Align your design as desired inside the shape outline of your jig template. For our leather patches we centered our design both vertically and horizontally across all 15 squares.
2. Place Your Jig and material: Place your jig in the laser bed in the same spot you had originally cut it. We recommend always using the top right-hand corner. Fill the cut-outs of the jug with your material for as many designs as you need. We placed our jig and filled all 15 squares with our leather patches.
3. Send your design to the laser: Now that the jig is ready to use, ignore the cuts of your original jig template and only define the engravings and cuts specific to your design.
4. Redesign and Repeat: Now that you have your jig cut and a jig template file created you are ready to keep going! Simply open your jig template file and replace old designs with your new design and align accordingly.
Pro-tip: We always recommending keeping a master file of your jig template and saving any versions of the file with a new design as a new file. Be extra careful when editing your jig template that you do not move the original outlines of your jig cut-outs.

We were able to cut out over 50 patches with just 4 laser sessions. Engraving 15 leather patches took us less than 15 minutes on our Epilog Fusion Edge! This means in less than 90 minutes we were able to engrave and heat transfer all our patches!
We hope this guide helps you determine when and how to use a jig to optimize your production time and avoid those annoying alignment issues.
Follow us on instagram or facebook @houstoancrylic to get more laser cutting tips and tricks!
Comments